Every year I try something different for the two tall planters that flank our driveway.
This year I’m starting with a blank slate.
A few years ago I planted a small box shrub in each one, in an attempt to take up space and add green interest year round. I’ve been using the prunings from my Harry Lauder’s Walking Stick, spray painted to make them pop against our black fence.
I noticed this summer the box were looking pretty sad so I took them out of the planters. One went into a bed in the front of the house, and the other went into the compost heap.
Here are the planters from winter and spring, first photo with the box and a couple hellebores that later went into the shrub garden.
Next are the planters from last winter, with the Harry Lauder’s branches spray painted cherry red. Didn’t it look really pretty dusted in snow?


I have four artificial wreaths I hang on the fence every winter. They are at least five years old now and still look great. I change up the bows every year, making them myself. By picking up ribbon on sale, it’s affordable to change things up.

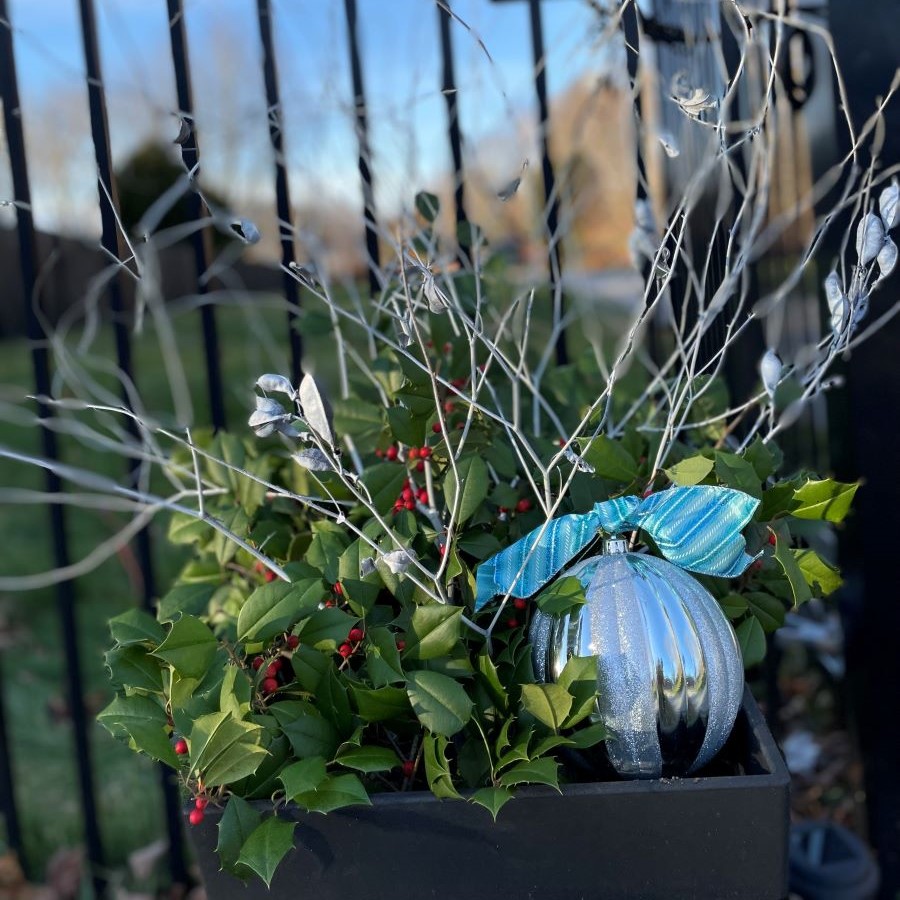
As mentioned, I had a clean slate to begin with. Since the bows on the wreaths are blue and silver, I wanted to keep in harmony with those colors. This summer I put a small [new] bed around the spigot that is on the outside of the fence, so I wanted to repeat color there.
The Harry Lauder’s branches are fun and whimsical, but I was feeling bored with the same old-same old. Inspiration struck when I cleaned out the pollinator garden: looking at a handful of baptisia stems I thought, these are really attractive in a wild way, especially with the seed pods. I wonder what they’d look like spray-painted?
In a word: fabulous.
I didn’t want to use bows in the planters, so I pondered on how to add extra interest. A-ha! I could add some big plastic ornaments, both in the planter and resting on the ground in the new bed.
Off to Michael’s I went, but no luck there. The ornaments were either too big, too small, or only came in red and green- no blue.
Christmas Tree Shop to the rescue! I found the cutest blue and silver ornaments, and at $4 each, affordable.
Then I hit a snag in my vision. How to prevent the balls from blowing away? At first I thought of using a landscape staple through the plastic loop at the top of the ornament. But then one wouldn’t be able to see the ‘ornamenty’ top and they would just look like balls…
More pondering…
Genius! I filled them all half full of water. There was an opening at the top of ball, just like a regular glass ornament, and I could trickle water from the tap into the ball.
So far, so good. There have been several windy days, and they haven’t moved an inch!
Off I went to cut some greens to fill in the planters and then set to work. What do you think?


Do you have planters for winter? I’m loving the blue, silver and white color scheme. It’s something new. Plus the baptisia looks amazing (the left planter is windswept but that’s okay!). A can of spray paint works miracles.
Here is the new bed around the spigot. I claimed this coal hod from my parent’s attic years ago and I love it.


I have to add the holly berries this year are intense! Branches are just loaded with berries and I’m excited to use them in the flower arrangements for church this winter. Do you have access to winter greens? How is the holly in your region this year?
Happy Winter Solstice, garden friends, and may you find joy this season, however you celebrate!
Hugs, Pam